Living room · 11 steps
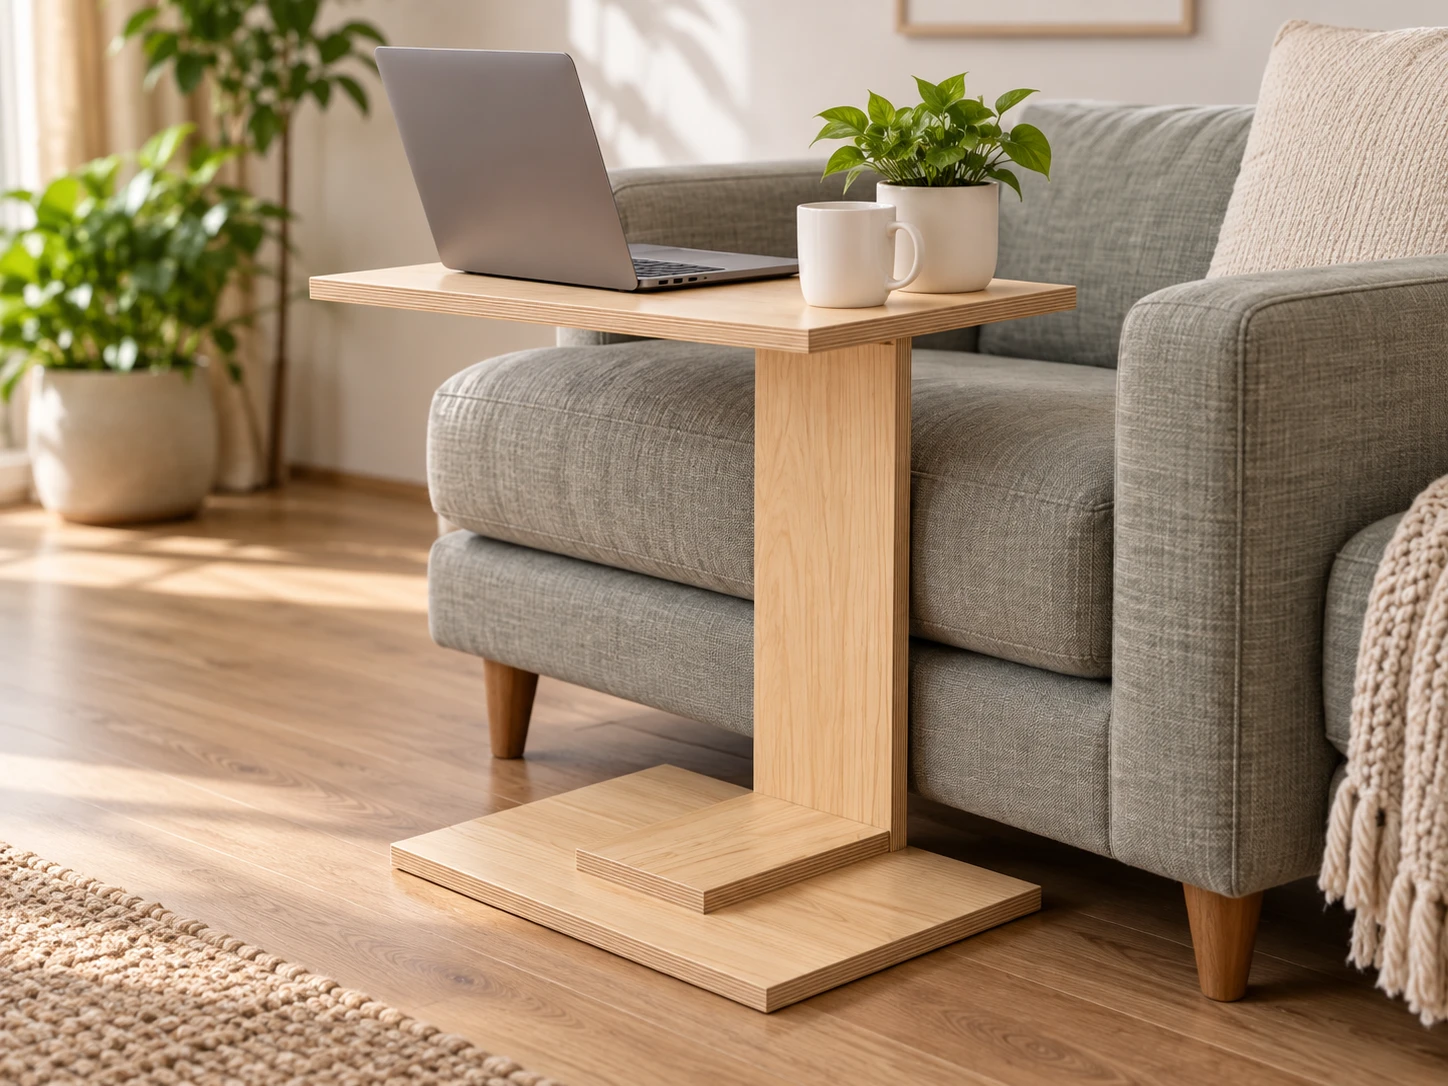
Modern C-Table
Slides over your sofa. Holds coffee, laptop and snacks. One plywood panel, one afternoon.
- Finished size
- 18" W x 14" D x 25" H
- Metric
- 457 mm x 356 mm x 635 mm
- Material
- 3/4" plywood panel, 2 x 4 ft
- Steps
- 11
- Build time
- 3-4 hours + finish
- Skill
- Beginner
What you will build
A C-shaped side table that slides under your sofa so the top sits over the seat or arm: a stable spot for coffee, a laptop or a plate. It is cut from a single 2 x 4 ft panel of 3/4 in plywood and joined with dowels, pocket screws and glue, so there are no visible fasteners on the top. A beginner with a circular saw, a drill and a pocket-hole jig can build it in an afternoon.
Cut list
All parts 3/4" (19 mm) plywood, cut from one 3/4" plywood panel, 2 x 4 ft.
| Part | Name | Qty | Length | Width |
|---|---|---|---|---|
| A | Top | 1 | 18" (457 mm) | 14" (356 mm) |
| B | Upright | 1 | 23-1/2" (597 mm) | 6" (152 mm) |
| C | Upper support | 1 | 10" (254 mm) | 6" (152 mm) |
| D | Base | 1 | 18" (457 mm) | 14" (356 mm) |
| E | Lower support | 1 | 10" (254 mm) | 6" (152 mm) |
Tools
- Circular sawOr have the store cut the panel
- Drill / driver
- Pocket-hole jigThe tool that makes beginner furniture easy
- Dowel jig + 3/8" bit
- 3/8" dowel centers
- Countersink bit with 1/8" pilot drill
- Bar clamps (4)
- Speed square
- Tape measure
- Random orbit sander
Materials
- 13/4" plywood project panel, 2 x 4 ft (birch or sanded pine)
- 43/8" x 1-1/2" fluted dowel pins
- 41-1/4" coarse-thread pocket screws
- 8#8 x 1-1/4" flat-head wood screws
- 1#8 x 1-1/2" flat-head wood screw
- 1Wood glue
- 1 setSandpaper 120 / 180 / 220 grit
- 1Wipe-on polyurethane (or stain + poly)
Tool and material links are affiliate links. Disclosure.
Step-by-step instructions
The same steps as the interactive 3D guide, where each step is animated.
1The finished project
A sofa C-table 18" wide, 14" deep and 25" tall, made from five plywood parts.
- Read every step once before you cut anything.
- Measure your sofa: the base is 3/4" thick and must slide under it, and the top sits 24-1/4" off the floor.
- Measure your plywood with a tape. This plan assumes 3/4". If yours is thinner, the cut list stays the same - only check screw lengths in step 8.
Designed for light loads: drinks, a laptop, books. It is not a seat or a step stool.
2Tools & materials
Gather everything before you start so the glue-up goes smoothly.
- Buy one 3/4" plywood panel, 2 x 4 feet. Birch looks best with a clear finish.
- Pick up the fasteners on the materials list. Exact lengths matter in this build.
- Set up a flat work surface at least 24" x 48".
Wear eye and hearing protection when cutting and drilling.
3Cut the parts
Cut all five parts from one 2 x 4 ft panel.
- Crosscut the panel at 28-1/4" from the left end.
- Left piece: rip it to 18" wide, then crosscut it at 14" to get Top A and Base D, each 18" x 14". The second piece is a hair longer: trim it to 14".
- Right piece: rip a strip 6" wide and crosscut it to 23-1/2" for Upright B.
- Rip a second strip 6" wide and crosscut two pieces 10" long for supports C and E.
- Label every part with its letter in pencil and lightly sand the edges.
Most home centers will make these cuts for you at no charge. Show them this diagram.
Each cut removes about 1/8" of wood (the saw kerf). The layout already allows for it.
4Drill the pocket holes in C and E
Drill two pocket holes in one end of each support. Later they let you screw the supports tight to the upright.
- Lay supports C and E flat on your bench. Each one is 10" long and 6" wide.
- Pick one 6"-wide end on each board. This is the end that will touch the upright B. Mark it with a pencil arrow.
- On that end, mark two centers 2" in from each long edge. The holes end up 2" apart, so the 6" width is split into three equal parts.
- Set your pocket-hole jig and drill collar for 3/4" material. Line the jig guides up with your marks, clamp the jig flush with the marked end, and drill both holes. The holes slant toward the marked end.
- Write "POCKET FACE" on the face that has the holes. On E this face goes UP. On C it goes DOWN, facing the floor.
Clamp the jig to the board. Never hold a small board by hand while drilling.
The drawing shows C turned over so you can see its pocket face. The orange numbers are distances from the edge.
5Drill the dowel holes
Drill matching dowel holes so the upright locks into the base and into the top.
- Pick the better-looking face of Top A: that is the tabletop. The other face is the underside, where the holes go. Pencil UNDER on it.
- Pencil the word BACK on one long edge of Base D, and on one long edge of the underside of Top A. Upright B will sit flush with that edge.
- On each end of Upright B, mark two dowel centers on the middle of the 3/4" edge, 1" in from each side. The drawing shows the spots.
- Drill them with the dowel jig and a 3/8" bit, 1-1/16" deep. Wrap tape around the bit as a depth stop.
- Put a dowel center in each hole on one end of B. Stand B on D with its back flush with the BACK edge and 6" of board on each side of it, then press. The centers mark D. Drill those marks in D only 1/2" deep.
- Do the same with the other end of B against the underside of A: flush with the BACK edge, 6" of board on each side. Drill those marks in A only 1/2" deep.
Drill A and D only 1/2" deep, not deeper. Use a tape flag on the bit as a depth stop.
6Attach the upright to the base
Glue and dowel Upright B to Base D, then lock it with one screw from underneath.
- Dry fit first: put a dowel in each hole of B, stand B on D and check that everything lines up. Take it apart.
- Put glue in the dowel holes in D and on the bottom end of B. Tap the dowels into B, then press B onto D: flush with the BACK edge, with 6" of base on each side of it.
- Check B is square to D with a speed square, and clamp it.
- Turn the assembly over. On the underside of D, mark one screw spot: halfway across (9" from either side edge) and 3/8" in from the BACK edge. It lands in the middle of the upright above it.
- Drill a 1/8" pilot hole up through D and about 3/4" into B. Countersink the hole on the underside of D.
- Drive one #8 x 1-1/2" screw. Wipe off squeeze-out with a damp rag.
Check square before the glue grabs - you have about 5 minutes.
7Install the lower support E
Brace the upright to the base with support E: two pocket screws into B, then four screws up from below.
- Dry fit: set E on D with its POCKET FACE up and its pocket-hole end touching B. E is centered, with 6" of base on each side.
- Glue the bottom of E and its pocket-hole end. Press E tight against B and clamp it to D.
- Drive two 1-1/4" pocket screws, one in each pocket hole. They slant down from the top of E into the upright B. These are the blue screws in the drawing.
- Turn the assembly over. On the underside of D mark four screw spots: 7" in from each side edge, in two rows. One row is 4-1/4" from the front edge, the other is 3" from the BACK edge.
- Drill and countersink a pilot hole up through D at each spot, then drive four #8 x 1-1/4" screws. They stop inside E.
Use 1-1/4" screws only. Longer screws will come out of the top face of E.
8Attach upper support C to the top
Fasten C under Top A. You build this half upside down on your bench.
- Lay Top A on a towel with its good face down. The underside now faces up.
- Find the BACK edge you marked in step 5, next to the two dowel holes. Upright B will sit flush with this edge.
- Place C on the underside of A with its POCKET FACE up, facing you. The pocket-hole end of C points toward the BACK edge and stops 3/4" short of it: that gap is where B goes. C is centered, with 6" of A on each side.
- Glue C down. Mark four screw spots on C: 1" in from each long side, 1" in from the front end, and 2-1/4" in from the pocket-hole end.
- Drill and countersink a pilot hole through C at each spot, then drive four #8 x 1-1/4" screws down into A.
- Leave the two pocket holes empty. You use them in step 9.
Screw length matters: 1-1/4" through two 3/4" layers leaves about 1/4" of wood above the tip. Longer screws will come through your tabletop. If your plywood is under 11/16", use 1-1/8" screws.
9Attach the top assembly
Join the top half (A and C) to the upright B.
- Dry fit: lower the top assembly onto B with no glue. A should be flush with B at the back, and the pocket-hole end of C should touch the front face of B. Lift it off.
- Put glue in the two dowel holes in the top end of B and tap in the dowels. They stand 1/2" proud.
- Spread glue on the top end of B and on the pocket-hole end of C.
- Lower the top assembly so the holes in the underside of A slide over the dowels. Press it down, line up the back and sides, and clamp.
- Turn the table on its side. Drive two 1-1/4" pocket screws, one in each pocket hole in C. They slant up into B (the blue screws).
- A is held by the two dowels, the glue and the four screws from step 8. You will not see a screw on top of A.
Do not load the table until the glue has cured for 24 hours.
10Sand & finish
Make it look like store-bought furniture.
- Sand all faces with 120, then 180, then 220 grit. Slightly round every sharp edge.
- Optional pro look: iron edge banding onto the exposed plywood edges and trim it flush.
- Wipe off dust. Apply 3 thin coats of wipe-on polyurethane, sanding lightly with 220 between coats.
Oily finishing rags can catch fire on their own. Lay them flat outdoors to dry.
11Final check
Make sure it is stable and solid before daily use.
- Set the table on a flat floor. It must not rock.
- Press down on the front edge of the top. It should feel firm with no creaking joints.
- Slide the base under your sofa and check the top clears the cushion.
Light loads only. Do not sit or stand on the table.
Modern C-Table: frequently asked questions
What size is the Modern C-Table?
The Modern C-Table is 18 in wide, 14 in deep and 25 in tall (457 x 356 x 635 mm). The top sits 24-1/4 in off the floor and reaches 13-1/4 in in front of the upright, which is enough to hold a laptop or a plate over a sofa seat or arm.
How much plywood do I need to build a C-table?
You need one 2 x 4 ft project panel of 3/4 in plywood. All five parts come out of it: the top and the base (18 x 14 in each), the upright (23-1/2 x 6 in) and two supports (10 x 6 in each), with room left for saw cuts.
What tools do I need to build a C-table?
You need a circular saw (or the store can cut the panel), a drill/driver, a pocket-hole jig, a 3/8 in dowel jig with 3/8 in dowel centers, a countersink bit, four bar clamps, a speed square, a tape measure and a sander.
How long does it take to build a C-table?
A beginner can build the Modern C-Table in 3 to 4 hours of shop time, plus drying time for the glue and the finish. The plan has 11 steps.
Will a C-table fit under my sofa?
It fits if your sofa has at least 1-1/2 in of open space under the front edge, because the base and the lower support are 3/4 in thick each. The seat or arm the top reaches over must also be lower than 23-1/2 in. Measure both before you cut.
How are the parts of the C-table joined?
The parts are joined with glue, four 3/8 in dowels, four pocket screws and nine countersunk wood screws, all hidden under the top, under the base or inside the joints, so no fastener shows on the top.
Is the C-table a good first woodworking project?
Yes. It has five straight-cut parts, one panel of plywood and no angled cuts, and every hole position is shown with its distance from the edges in inches and millimeters.
How much weight can a plywood C-table hold?
The Modern C-Table is designed for light loads such as drinks, a laptop, books or a plate. It is not a seat or a step stool, and you should not lean on the top.
Get the next plan
We let you know when a new plan is published.
More plans
2x4 Garage Shelving
Freestanding 8 ft shelving from studs and plywood.
Vote on FacebookMiter Saw Station
Flat, fence-level wings and storage below.
Vote on FacebookFloating Wall Shelves
Hidden-bracket shelves from one board.
Vote on Facebook