Living room · 12 steps
Plywood Coffee Table
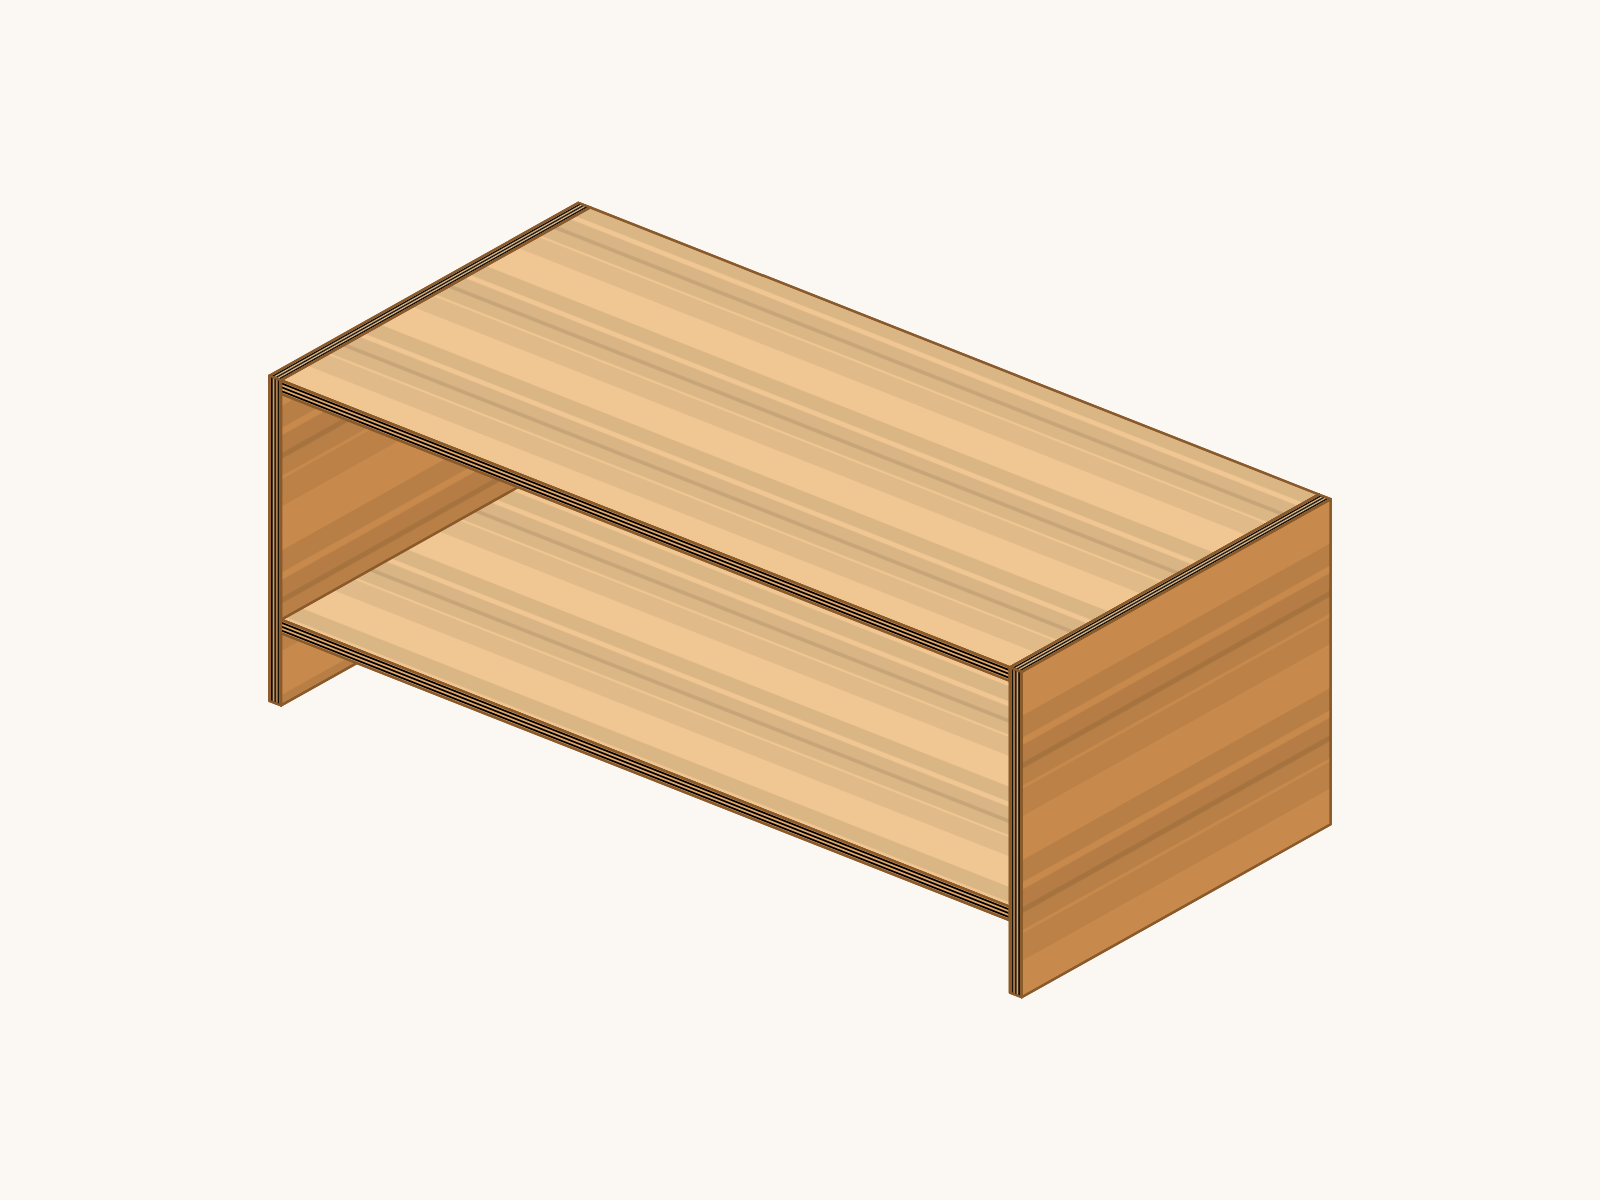
A modern 48 in waterfall coffee table with a lower shelf, from one sheet of plywood. Pocket screws, none on top.
- Finished size
- 48" W x 23-1/2" D x 18" H
- Metric
- 1219 mm x 597 mm x 457 mm
- Material
- 3/4" plywood, one 4 x 8 ft sheet
- Steps
- 12
- Build time
- 1 day
- Skill
- Beginner
What you will build
This DIY coffee table is a modern waterfall-style table, 48 x 23-1/2 x 18 in, with a lower shelf, built from one 4 x 8 ft sheet of 3/4 in plywood. A beginner can build it in about a day with a circular saw, a drill and a pocket-hole jig. The two sides run from the floor to the top surface, and the top, the shelf and a back apron sit between them. Every joint is glued and fixed with 1-1/4 in pocket screws from the inside or from below, 24 in all, so no screw shows on the top or on the outside of the sides. The shelf top is 4-3/4 in off the floor, with 12-1/2 in of open height up to the top. Iron-on edge banding hides the plywood edges that show. The plan has five parts, every cut is straight, no cut is longer than 48 in, and the cut diagram fits the whole table on one sheet with the saw kerf allowed for. Allow drying time for the finish.
Cut list
All parts 3/4" (19 mm) plywood, cut from one 3/4" plywood, one 4 x 8 ft sheet.
| Part | Name | Material | Qty | Length | Width |
|---|---|---|---|---|---|
| A | Top | 3/4" plywood | 1 | 46-1/2" (1181 mm) | 23-1/2" (597 mm) |
| B | Side | 3/4" plywood | 2 | 18" (457 mm) | 23-1/2" (597 mm) |
| C | Shelf | 3/4" plywood | 1 | 46-1/2" (1181 mm) | 23-1/2" (597 mm) |
| D | Back apron | 3/4" plywood | 1 | 46-1/2" (1181 mm) | 3-1/2" (89 mm) |
Tools
- Circular sawOr have the store cut the panel
- 4 ft straightedge
- Bar clamps (4)
- Tape measure
- Speed square
- Iron (household or edge-banding iron)Melts the glue on iron-on edge banding
- Utility knife
- Drill / driver
- Pocket-hole jigThe tool that makes beginner furniture easy
- Random orbit sander
Materials
- 13/4" plywood sheet, 4 x 8 ft
- 241-1/4" coarse-thread pocket screws (24 needed, a box of 100 is fine)
- 1Wood glue
- 1Iron-on edge banding, 13/16" wide, 50 ft roll (wood to match the plywood)
- 1 setSandpaper 120 / 180 / 220 grit
- 1Wipe-on polyurethane (or stain + poly)
- 1Rigid foam board, 2" thick, 4 x 8 ft (work surface)
Tool and material links are affiliate links. Disclosure.
Step-by-step instructions
The same steps as the interactive 3D guide, where each step is animated.
1The finished project
A waterfall coffee table 48" wide, 23-1/2" deep and 18" tall, with a lower shelf, from one sheet of 3/4" plywood.
- Read every step once before you cut anything.
- The two sides B, 18" tall and 23-1/2" deep, run from the floor to the top surface like a waterfall. The top A, 46-1/2" long, sits between them, flush with their top ends.
- The shelf C sits between the sides with its top face 4-3/4" off the floor, which leaves 12-1/2" of open height up to the top. A back apron D, 3-1/2" tall, is glued and screwed under the back edge of the top and to both sides: it stiffens the table.
- Every joint is glued and fixed with pocket screws from the inside or from below, 24 in all, so no screw shows on the top or on the outside of the sides. Iron-on edge banding covers the plywood edges that show.
- You need a helper in steps 9, 10 and 11, while the table is assembled lying on its back.
This plan does not give a weight rating. It is a coffee table for drinks, books and everyday items, not a seat or a step stool.
2Tools & materials
Gather everything before you start.
- Buy one 4 x 8 ft sheet of 3/4" plywood. Birch or another hardwood plywood with a smooth face takes edge banding, stain and clear finish well.
- Measure the thickness of the sheet: plywood sold as 3/4" is often a little thinner, about 23/32". The cut list stays the same and the table comes out up to 1/16" narrower. Step 5 tests one pocket screw in two offcuts before you drill the parts.
- Pick up 24 pocket screws, 1-1/4 in long with coarse threads (the kind for plywood and softwood), wood glue and iron-on edge banding 13/16" wide. The banded edges add up to more than a 25 ft roll, so buy a 50 ft roll.
- The rigid foam board must be 2" thick: you cut the sheet on it in step 3 and use it as a soft work surface for the rest of the build.
Wear eye and hearing protection when cutting and drilling.
A 4 x 8 ft sheet of plywood is heavy and catches the wind. Carry it with a helper.
3Cut the plywood
Cut the top, the shelf, the two sides and the back apron from one sheet of 3/4" plywood.
- Lay the sheet on the foam board on the floor, better face down (a circular saw splinters the face on top), and set the blade about 1/4" deeper than the plywood: the foam supports both sides of every cut. For every cut, clamp the straightedge to the sheet as a saw guide.
- Cut 1: crosscut the sheet 46-1/2" from one end. Rip this piece to 23-1/2" wide: top A. Rip the rest of it to 23-1/2" wide too: shelf C.
- Cut 2: crosscut the rest of the sheet 46-1/2" long. The strip of about 2-3/4" left over is waste.
- From this piece, rip a strip 3-1/2" wide: the back apron D. Then rip a strip 23-1/2" wide and cut two sides B from it, 18" long each.
- From the rest of that strip, cut two spacers 9" long and 3-1/2" wide, drawn dashed on the diagram: they set the shelf in step 10. Pencil the letter on every part and keep the offcuts for test holes.
Most home centers will make these cuts on their panel saw. Show them this diagram.
Each cut removes about 1/8" of wood (the saw kerf). The layout already allows for it.
A, C and D must be exactly the same length, 46-1/2", and both sides exactly 18", or the table will not be square.
4Edge band the exposed edges
Mark the parts, then iron edge banding onto the 11 plywood edges that show.
- Mark the faces first. Top A and shelf C: pencil UNDER on the worse face and FRONT on one long edge. Sides B: pencil OUT on the better face and TOP on one 23-1/2" end. Apron D: pencil BACK on the better face and BOTTOM on one long edge.
- Band these edges: both long edges of A and of C, both 18" edges and the TOP end of each side B, and the BOTTOM edge of D. Leave the ends of A, C and D, the bottom ends of the sides and the top edge of D bare: they are glued into joints or stand on the floor.
- Cut each strip about 1" longer than its edge. Lay it glue side down, centered on the edge, and press the iron slowly along it at the setting on the roll, then rub it down with an offcut block while it cools.
- Trim the ends flush with the utility knife, then trim the overhang flush with both faces, cutting away from your other hand. On each side, band the two long edges first, then the TOP end, so the end strip covers their ends.
- Sand the trimmed edges lightly with 180 grit on a block, stroking toward the face so the banding does not lift.
The iron and the melted glue are hot. Keep your fingers off the banding until it cools.
The banding is very thin: never sand through it at the corners.
5Drill the pocket holes in the top and the shelf
Drill four pocket holes in each end of top A and of shelf C, all in the UNDER face: 16 holes.
- Set the pocket-hole jig and its drill collar for 3/4" material, as the jig manual says. Drill a test hole in an offcut and drive a 1-1/4 in pocket screw through it into the face of a second offcut: the tip must stay inside the second offcut. If it comes through, check the jig setting before you go on.
- Lay A on the foam board, UNDER face up. At each end, mark four holes along the end: 2-3/4" from the FRONT edge, then every 6". The last one is 2-3/4" from the back edge.
- Clamp the jig flush with the end at each mark and drill. The holes slant toward the end: they will hold A to the sides.
- Do the same on shelf C, UNDER face up: four holes in each end, at the same distances from its FRONT edge.
Clamp the jig to the part every time. Never hold it by hand while drilling.
Drill only into the UNDER faces. A pocket hole in the top face of A or C cannot be hidden.
6Drill the pocket holes in the apron
Drill eight pocket holes in the front face of apron D: two in each end and four along the top edge.
- Lay D on the foam board, BACK face down. The face up is the front face: all eight holes go in it.
- Ends: at each end, mark two holes along the end, 1" from the BOTTOM edge and 1" from the top edge. Clamp the jig flush with the end and drill. These holes will hold D to the sides.
- Top edge: mark four holes along the top edge (the bare long edge), 5-1/4" from each end and 12" apart. Clamp the jig flush with the top edge at each mark and drill. These holes slant toward the top edge: they will hold D to the underside of A.
Drill only into the front face. The BACK face shows from behind the table.
7Glue and screw the apron to the top
Glue apron D on edge to the UNDER face of top A, along its back edge, and drive four pocket screws.
- Lay A on the foam board, UNDER face up, with its back edge (the one without FRONT) about 2" past the edge of the foam so a clamp can reach under it.
- Spread glue on the top edge of D and stand D on it on A, BACK face out, flush with the back edge of A. Its ends are flush with the ends of A: both are 46-1/2" long.
- Check with the speed square that D stands square to A, then clamp it at both ends: one jaw on the BOTTOM edge of D, the other under A.
- Drive a 1-1/4 in pocket screw into each of the four holes along the top edge of D, the middle two first. Leave the four end holes empty: they go into the sides in steps 9 and 11. Wipe off any glue squeeze-out.
Keep D flush with the back edge of A while you drive the screws: it shows from behind the table.
8Mark the shelf on both sides
Draw two lines across the inside face of each side B: the shelf fits between them.
- The inside face of each side is the face without OUT. The bottom end is the bare end, opposite TOP.
- Measured from the bottom end, draw a line across the inside face at 4" and a second line at 4-3/4", with the speed square held against the front edge.
- The shelf C fits between the two lines. Its top face is then 4-3/4" off the floor. Mark both sides the same way: they are mirror images once they face each other.
Measure from the bottom end on both sides, never from the TOP end, or the shelf will not be level.
9Attach side B1
With the top lying on its back, glue side B1 to the left ends of A and D and drive six pocket screws.
- From here on the table is built lying on its back on the foam board, with a helper; the drawing shows it standing. Stand A on its back edge on the foam: D lies flat, BACK face down, and the FRONT edge of A points up.
- Spread glue on the left ends of A and D. Stand side B1 on its back edge against them, OUT face out, its TOP end flush with the top face of A. The back edges all sit on the foam, so they are flush.
- Hold the speed square in the corner between A and B1 to check it is square. With your helper holding B1 tight against the ends, drive the four pocket screws in the left end of A and the two in the left end of D. Hold the drill with its handle toward the open front.
- Wipe off any glue squeeze-out with a damp rag.
Keep the table lying on its back until side B2 is on: it is not square yet.
10Attach the shelf to B1
Glue shelf C to B1 between the lines, set it with the two spacers and drive four pocket screws.
- Spread glue on the left end of C. Stand C on its back edge on the foam, UNDER face toward the bottom ends of the sides, with its end against B1 between the two lines.
- Lay the two spacers flat on the foam between the top face of C and the BOTTOM edge of D, about 6" from each end of C. They hold C parallel to A, 9" below the apron.
- With your helper holding C upright and against B1, drive the four pocket screws in the left end of C into B1. The drill sits in the open space past the bottom ends of the sides.
Check that C stays between the two lines on B1 while you drive the screws.
11Attach side B2 and square the table
Glue side B2 to the free ends, make both diagonals equal, then drive its ten pocket screws.
- Spread glue on the right ends of A, D and C. Stand side B2 on its back edge against them, OUT face out, its TOP end flush with the top face of A and the shelf between its two lines. Nothing slides in: B2 just comes against the ends.
- Measure both diagonals across the front edges, from the TOP end of one side to the bottom end of the other: both must be 51-1/4". If they differ, push the corners of the longer diagonal toward each other until they match.
- Drive one pocket screw through A into B2 at the front and one through C. Measure the diagonals again, then drive the other eight: three more through A, three more through C and the two in the right end of D.
- Take out the spacers, wipe off the squeeze-out and, with your helper, stand the table up on its sides.
Check the diagonals before the last eight screws: once they are in, the table can no longer be squared.
12Sand, finish and check
Sand the table smooth, apply a finish if you like and check that it stands firm.
- Sand every face with 120, 180 and then 220 grit. Sand the banded edges lightly by hand and ease the corners.
- Wipe off the dust. The finish is optional: two or three thin coats of wipe-on polyurethane, sanded lightly with 220 grit between coats. Follow the directions on the can.
- Set the table on a flat floor: it must not rock. Press on each corner of the top: no joint may move or creak.
Finish in a ventilated room and follow the safety directions on the can. Oily rags can catch fire on their own: lay them flat outdoors to dry.
Plywood Coffee Table: frequently asked questions
How tall should a coffee table be?
The Plywood Coffee Table is 18 in (457 mm) tall. Most coffee tables are 16 to 18 in tall, and a common rule of thumb is to keep the top about level with the sofa seat or 1 to 2 in lower, so measure your seat height first. To build this table lower, cut the two sides shorter and the two spacers shorter by the same amount; the shelf stays 4-3/4 in off the floor.
How much plywood do I need to build a coffee table?
The Plywood Coffee Table needs one 4 x 8 ft sheet of 3/4 in plywood. All five parts come out of it: the top and the shelf (46-1/2 x 23-1/2 in each), two sides (18 x 23-1/2 in) and a back apron (46-1/2 x 3-1/2 in), with the saw kerf allowed for and offcuts left for two spacers and test holes.
How long does it take to build a DIY coffee table?
The Plywood Coffee Table takes a beginner about one day to build, plus drying time for the finish. The plan has 12 steps, 5 parts and 24 pocket screws, and most of the time goes into cutting the sheet, ironing on the edge banding and drilling the pocket holes.
Can I build a coffee table without a table saw?
Yes, the Plywood Coffee Table needs no table saw: every cut is a straight cut with a circular saw guided by a clamped 4 ft straightedge, on a rigid foam board on the floor, and no cut is longer than 48 in. Most home centers will also make the cuts on their panel saw if you show them the cut diagram.
How do I hide the plywood edges on a coffee table?
The Plywood Coffee Table hides its plywood edges with iron-on edge banding on 11 edges: both long edges of the top and of the shelf, the front, back and top edges of each side, and the bottom edge of the back apron. You iron the banding on right after cutting, trim it flush with a utility knife and sand it lightly. The ends that are glued into a joint stay bare, and the edges add up to more than a 25 ft roll, so buy a 50 ft roll.
What finish should I use on a plywood coffee table?
The Plywood Coffee Table plan uses wipe-on polyurethane, two or three thin coats sanded lightly with 220 grit between coats, which leaves a clear film that helps protect the top from spills. You can stain the plywood first, or use a primer and paint instead. The finish is optional; follow the directions and drying time on the can.
How big should a coffee table be for my sofa?
The Plywood Coffee Table is 48 in long, which suits a sofa about 72 in long under the common guideline that a coffee table is about two thirds the length of the sofa. Many people also leave about 14 to 18 in between the sofa and the table so there is room for legs while drinks stay in reach. These are guidelines, not rules: measure your sofa and your room.
Can I change the size of this coffee table?
Yes, the Plywood Coffee Table can be made shorter, shallower or lower. Change the top, the shelf and the apron by the same length to make it shorter, the top, shelf and sides by the same depth to make it shallower (keep the pocket holes about 2-3/4 in from the front and back edges), or cut the sides and the two spacers shorter by the same amount to make it lower. A longer or deeper table needs a new cut layout and may not fit on one 4 x 8 ft sheet.
Get the next plan
We let you know when a new plan is published.